Your terms and conditions (also called terms of sale) belong on your invoices and quotes. In Sage Cloud Demat Invoicing you decide which documents they appear on and in what form: as text on the document, as a link to a web page, or as an image on the back.
You set this up once for your entire company. After that, you don’t have to do anything per document.
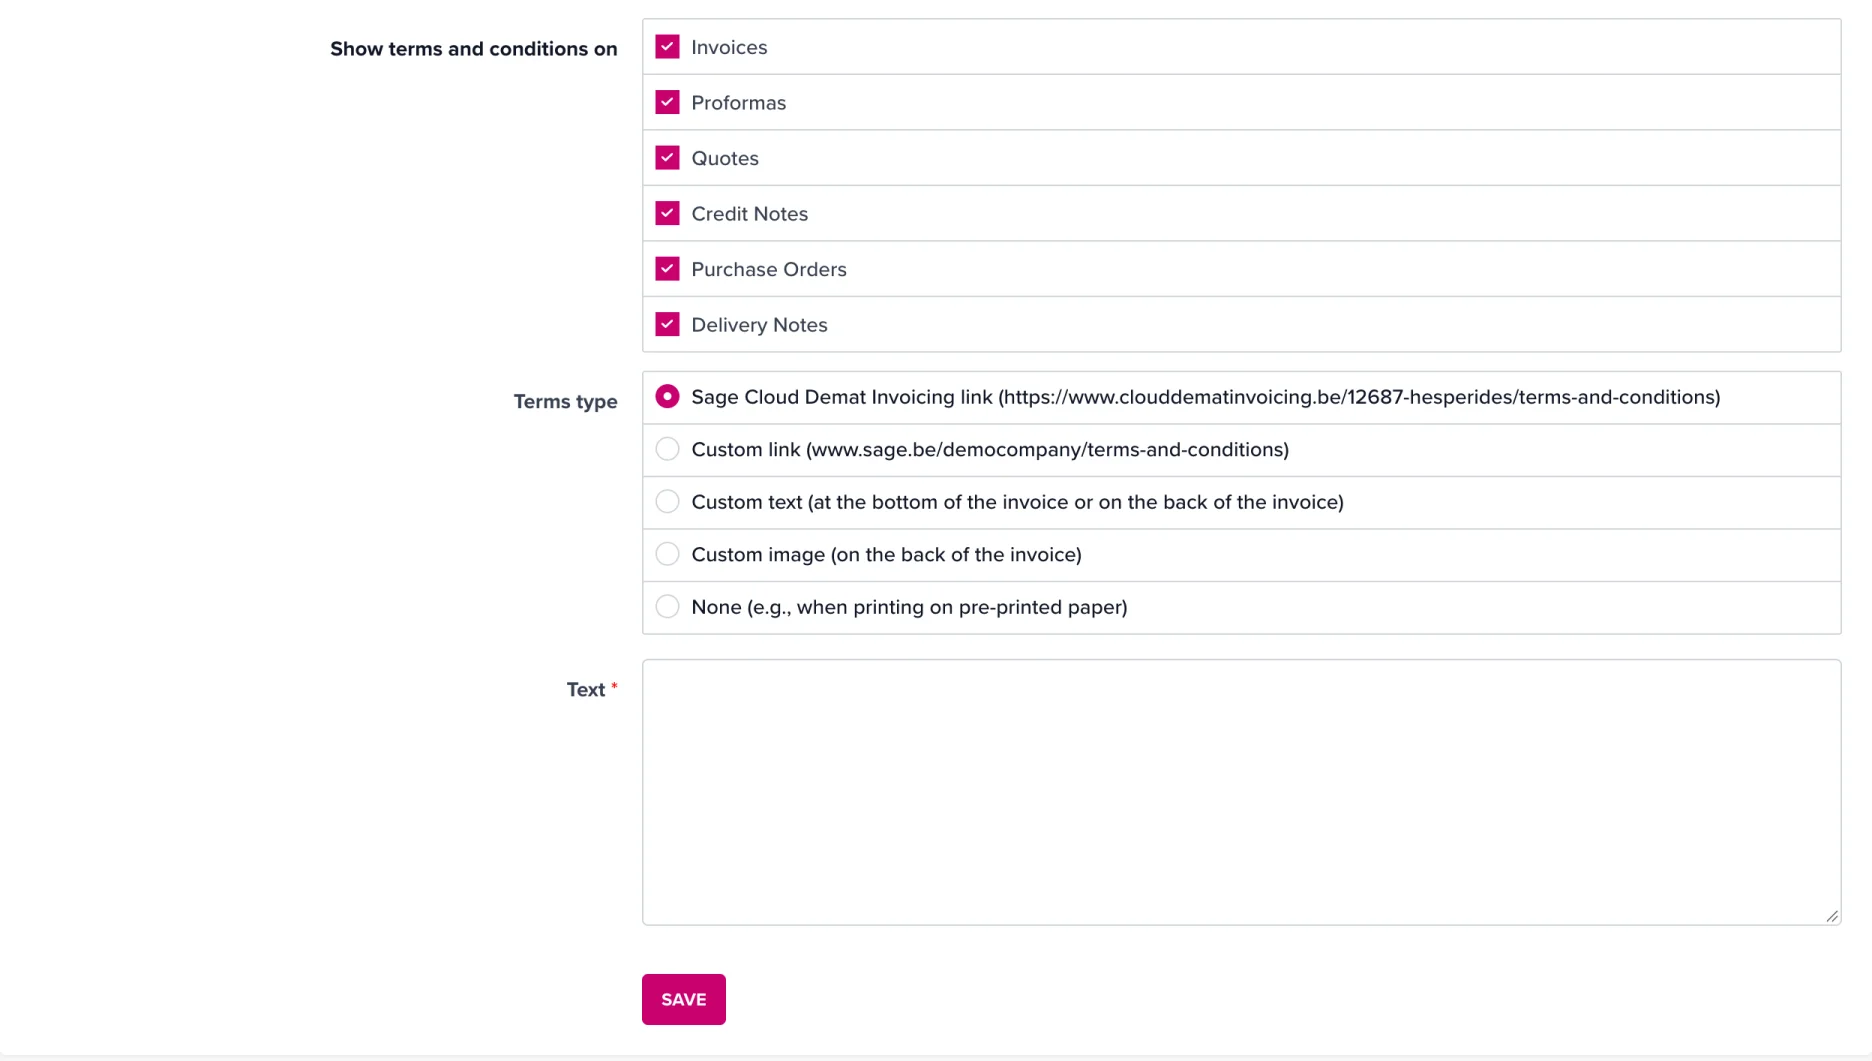
Under Show terms on, tick where your terms should appear:
Only tick what you need. If you tick nothing, your terms appear nowhere.
Under Type of terms, you choose how your terms are sent along:
| Type | What it does |
|---|---|
| Sage Cloud Demat Invoicing link | You type your terms into a text field. We publish them on a public web page and place the link to that page on your document. |
| Custom link | Your terms are already on your own website. You enter that URL and that link appears on the document. |
| Custom text | You type your terms into a text field. The full text is printed on the document itself. |
| Custom image | You upload an image (PNG or JPG) with your terms. It is placed on the back of the document. |
| None | No terms are sent along, for example when you print on pre-printed paper that already carries them. |
Depending on your choice, extra fields appear.
Click Choose terms image and select your file (PNG or JPG). To remove the image, click delete terms image.
Enter the full URL, for example https://www.yourwebsite.com/terms-and-conditions.
Click Save at the bottom. Your terms now appear automatically on the document types you ticked.
💡 Tip: Going for the Sage Cloud Demat Invoicing link? Your company then gets a public terms page that your customer can also print via the Print terms button. Handy if your terms are too long to fit on the invoice itself.
Important to know: as soon as an invoice, quote or credit note is sent (via Peppol, by email or through an export to your accountant), the terms and conditions on that document are frozen.
This means the document keeps showing the terms as they were at that moment, even if you change them later. A sent invoice therefore stays legally consistent with what your customer received.
If you change your terms, the new version only applies to documents you send afterwards.
⚠️ Please note: Have your terms reviewed by your accountant or a legal advisor. Sage Cloud Demat Invoicing prints what you enter, but does not check the content.
The other options on this same tab are covered in Can I customize my invoice template?
